
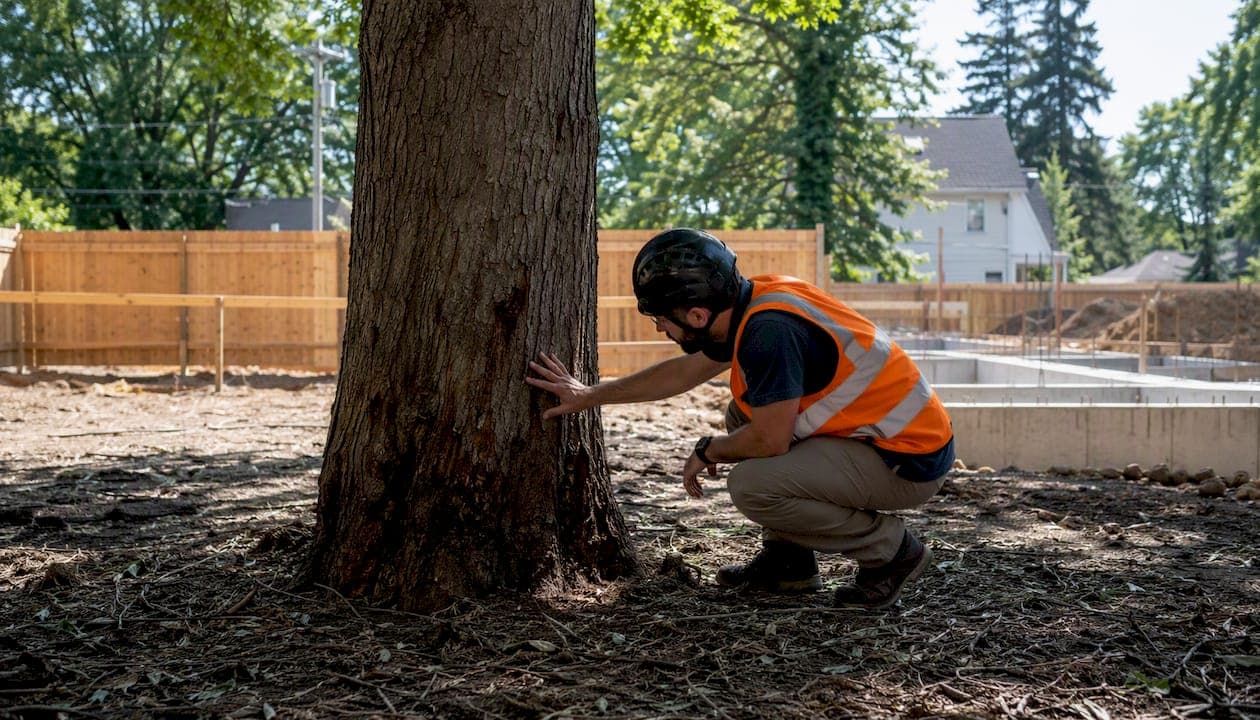
Effective tree preservation during construction comes down to five non-negotiable actions: hire an ISA-certified arborist before any equipment arrives, map and document every tree on the site, install Tree Protection Zone (TPZ) fencing before mobilization, avoid trenching in critical root areas or use non-destructive excavation when you cannot, and write enforcement clauses with financial penalties into every construction contract. Most tree deaths after construction are not caused by a single dramatic event. They result from cumulative root loss, soil compaction, and grade changes that quietly starve the root system over months or years.
Your pre-construction checklist:
- Hire an ISA-certified arborist to assess and map all trees before design is finalized
- Record species, trunk diameter (DBH), canopy spread, and health rating for each tree
- Calculate TPZ radius using a formula that multiplies trunk diameter by a standard distance and mark fence lines on construction drawings
- Install orange construction fencing at the TPZ boundary before any clearing or grading
- Route utilities outside critical root areas; use air excavation or tunneling where crossings are unavoidable
- Prohibit all equipment staging, material storage, and concrete mixing inside TPZs
- Include liquidated damages and a tree preservation bond in the general contractor agreement
- Schedule post-construction arborist inspections at 6 months, 1 year, and 2 years
Key Takeaways
Effective tree preservation during construction requires a documented arborist assessment, properly sized and enforced TPZ fencing, non-destructive excavation near root zones, and contract language with financial consequences for violations.
| Point | Details |
|---|---|
| Hire an arborist first | An ISA-certified arborist assessment before design is finalized prevents the costliest root conflicts. |
| Size TPZs correctly | Use the 1.25 ft per inch DBH formula; avoid trenching within 3× and preferably 5× DBH. |
| Enforce continuously | Damage is cumulative and delayed; one-time fencing without daily supervision is not protection. |
| Use non-destructive excavation | Airspade, hydro/vac, and directional boring reduce root loss when utilities must cross critical root areas. |
| Brileytreeservice | Provides pre-construction inventories, arborist-supervised root work, and post-construction monitoring across North Louisiana. |
Table of Contents
- 1. How to inventory and assess trees before work begins
- 2. Design and site-planning choices that reduce tree harm
- 3. Tree Protection Zones: how to size, fence, sign, and enforce them
- 4. Soil protection and compaction-control methods that preserve root health
- 5. Trenching and underground work near trees: non-destructive methods and root-pruning guidance
- 6. On-site controls during active construction: supervision, training, and materials handling
- 7. Short- and medium-term post-construction care
- 8. Remediation options and when removal is the only safe choice
- 9. Typical timeline and cost considerations for tree-preservation measures
- 10. Contract language, monitoring responsibilities, and financial protections
- Why tree protection is worth the investment
- Brileytreeservice can help protect your trees through every phase
- Sources
1. How to inventory and assess trees before work begins
The single most valuable step in any tree conservation program is a documented pre-construction inventory signed by an ISA-certified arborist or urban forester. Without it, you have no baseline to prove damage, no map to attach to drawings, and no defensible priority list when the footprint conflicts with a root zone.
A thorough arborist assessment covers species identification, trunk diameter at breast height (DBH), canopy spread, structural condition, and an estimated critical root radius for each tree. The arborist assigns each tree a priority rating: save, mitigate, or remove. Per the Minnesota Stormwater Manual, standard practice is to identify trees to protect, mark them clearly, and show protections on project drawings before any ground disturbance begins.
What the survey map must record:
| Field | What to Capture |
|---|---|
| Stem location | GPS coordinate or measured offset from a fixed benchmark |
| DBH | Measured at breast height; used to calculate TPZ radius |
| Canopy spread | North/south and east/west measurements |
| Critical root area | Calculated radius from trunk; note overlap with proposed footprint |
| Health rating | 1–5 scale (excellent to poor); poor-rated trees rarely survive construction stress |
| Priority | Save / mitigate / remove, with arborist rationale |
| Conflict type | Footprint, utility corridor, grading, access route |
Pre-construction conditioning improves survival odds before the first shovel breaks ground. Water trees deeply and consistently for several weeks before work begins, apply a layer of wood-chip mulch over the root zone, and complete any structural pruning at least one growing season ahead of construction. Soil testing at this stage identifies pH or nutrient deficiencies that would compound construction stress.
Not every tree is worth saving. Prioritize young, vigorous specimens and groups of trees with interlocking root systems. A mature tree in poor structural condition or with significant pre-existing disease will rarely survive the added stress of construction, and attempting to save it diverts resources from trees that can actually recover. A pragmatic arborist-led prioritization keeps the preservation budget focused where it produces results.
Pro Tip: Attach the signed arborist report and dated photo survey to the construction drawings as a numbered exhibit. This creates a legal baseline that is far harder for a contractor to dispute if damage occurs later.
2. Design and site-planning choices that reduce tree harm
The cheapest tree protection measure is a design change made before construction begins. Shifting a building footprint by 10 feet, rerouting a driveway, or relocating a utility corridor can eliminate a root conflict entirely, at zero additional construction cost.
When the footprint cannot move, foundation type matters. Pier foundations, helical pile systems, and cantilevered decks concentrate excavation at discrete points rather than along continuous trenches or spread footings. This approach dramatically reduces the total root area disturbed. On sites with high-value trees, an engineer and arborist working together at the design stage can often find a structural solution that keeps the critical root zone intact.
Utility routing is one of the most overlooked sources of construction damage to tree roots. Clustering all utilities in a single shared corridor outside the critical root area, rather than running separate trenches for water, sewer, gas, and electrical, can reduce root zone intrusion by a significant margin on a typical residential lot.
Temporary access routes deserve the same scrutiny as permanent infrastructure. A haul road that crosses a root zone repeatedly will compact soil to depths that suffocate fine roots, even if no trench is ever dug. Route access roads along the future driveway or hardscape footprint whenever possible.
On small sites where some root zone intrusion is unavoidable, engineered root protection systems, such as load-bearing bridge decking or interlocking ground protection mats, allow limited equipment access without direct soil contact. These are not a substitute for avoiding the zone entirely, but they are a practical mitigation when the geometry leaves no other option.
Pro Tip: Schedule a joint site walk with the arborist, civil engineer, and general contractor before design is finalized. Conflicts caught at that meeting cost nothing to resolve. The same conflicts discovered during construction can cost thousands in redesign, remediation, or tree replacement.
3. Tree Protection Zones: how to size, fence, sign, and enforce them
A Tree Protection Zone (TPZ) is the fenced exclusion area around a tree where no equipment, materials, or soil disturbance is permitted during construction. Getting the size right is the foundation of every other protection measure.
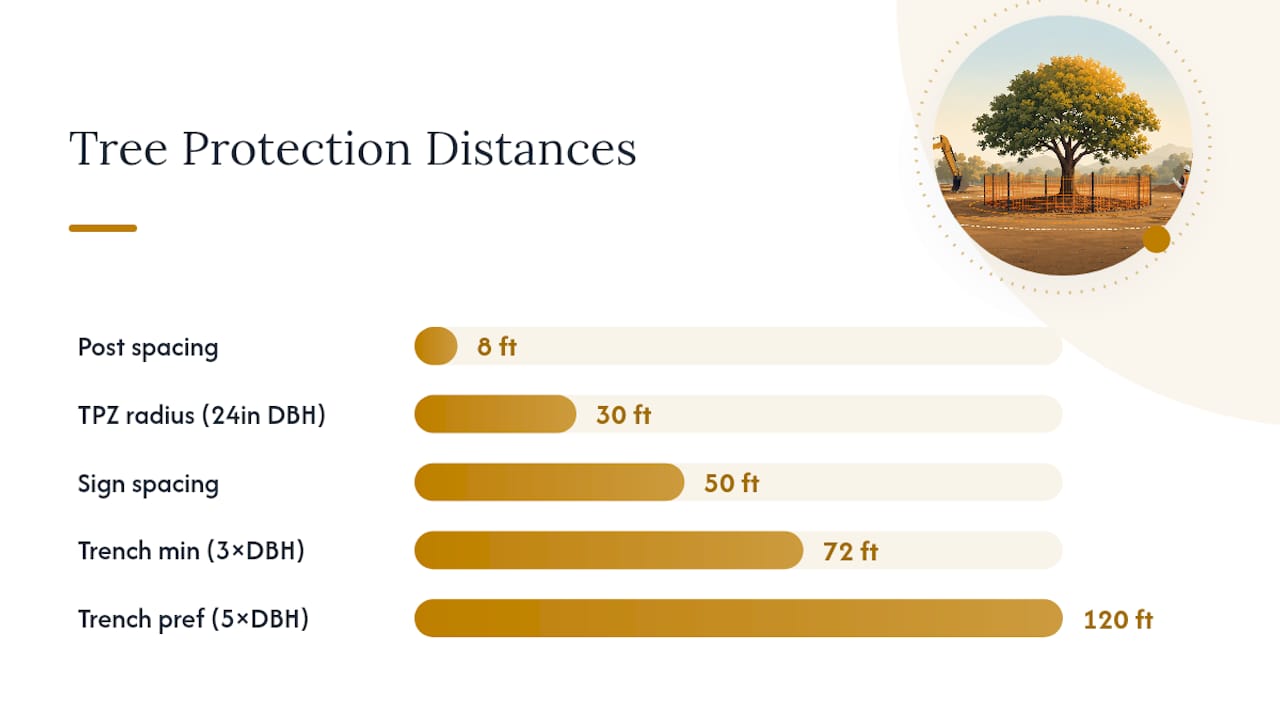
TPZ sizing formula: The widely used standard, published by NC State Extension, is a radius of 1.25 feet for every inch of trunk diameter (DBH). A 20-inch DBH tree requires a 25-foot radius TPZ. Many public agencies and municipal ordinances use this formula as a minimum; some require larger zones for protected species.
Worked example for a 24-inch DBH tree:
- TPZ radius = 1.25 ft × 24 in = 30 feet
- Fence perimeter = 2π × 30 ft, approximately one hundred eighty-some linear feet of fencing
- Any trench or excavation should stay at least 72 feet from the trunk (3× DBH) and preferably 120 feet (5× DBH) per NC State guidance
Fence specifications and placement:
| Requirement | Standard |
|---|---|
| Material | Orange polyethylene safety fencing or welded wire; minimum 4 ft tall |
| Posts | Steel T-posts at 8-ft intervals; driven securely into undisturbed soil |
| Placement timing | Installed before any clearing, grading, or equipment mobilization |
| Signage | Weatherproof signs every 50 ft: "Tree Protection Zone — No Entry" |
| Gates | Locked or wired shut; opened only with arborist authorization |
Enforcement is where most TPZ programs fail. A fence installed on day one and ignored by week two provides no protection. Designate a site supervisor with explicit stop-work authority for TPZ violations. Require photographic documentation of the fence line at the start of each work week. When the ideal TPZ radius overlaps the work footprint, consult the arborist before modifying the boundary. Approved modifications typically involve root buffers, ground protection matting, or hand-digging within the reduced zone, not simply moving the fence.
4. Soil protection and compaction-control methods that preserve root health
Soil compaction is the most common and most underestimated cause of post-construction tree decline. Tree roots occupy the top 6–12 inches of soil, and a single pass by a loaded concrete truck can compress that zone to a density that blocks oxygen and water movement for years.
Define vehicle routes before mobilization and enforce them. Temporary roads built on 6–8 inches of wood chips or commercial ground protection mats distribute equipment weight and reduce compaction significantly compared to bare soil. Restrict all heavy equipment to those defined corridors. A contractor who "just cuts across" the root zone once can cause damage that takes a decade to manifest.
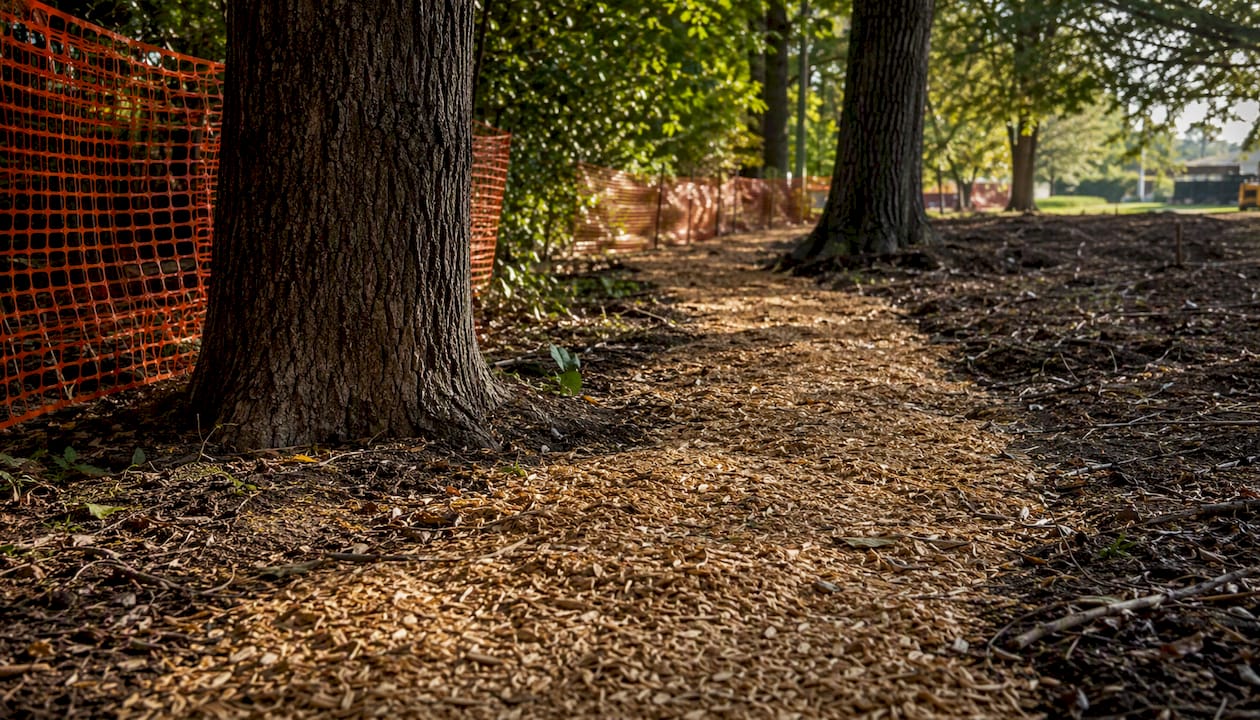
Mulching inside the TPZ serves two functions: it cushions foot traffic and retains soil moisture during the stress period. Apply 3–4 inches of coarse wood chips over the entire root zone, keeping mulch 6 inches away from the trunk flare. Do not use fine bark or compacted fill as a substitute; neither provides adequate aeration.
Pro Tip: If a vehicle must cross a root zone once, lay two layers of 4×8 plywood sheets over 6 inches of wood chips before the crossing. Remove them immediately after and inspect the soil. This is a last resort, not a routine access solution.
Chemical contamination is a separate risk that site teams often overlook. Concrete washout releases high-pH slurry that kills fine roots on contact. Designate a concrete washout area on hardscape or well outside any TPZ, and mark it on the site plan. Store fuel, paint, and solvents on impermeable surfaces with secondary containment, never on bare soil near trees.
After compaction occurs, remediation options include core aeration, vertical mulching (drilling 2-inch holes on 2-foot centers and filling with compost), and radial trenching with porous backfill. Texas A&M Forest Service notes that air excavation and hydro/vacuum excavation are effective lower-damage methods for exposing and repairing root zones without the mechanical tearing that conventional equipment causes.
5. Trenching and underground work near trees: non-destructive methods and root-pruning guidance
Trenching is the fastest way to destroy a tree's structural root system. Research published in Arboriculture & Urban Forestry found that cutting roots closer to the trunk reduces root volume and measurably reduces tree stability, with the effect becoming significant when cuts occur within 5× the trunk diameter. For a 12-inch DBH tree, that means any trench within 60 feet carries real stability risk.
NC State Extension recommends avoiding trenching within 3× DBH and preferably 5× DBH when feasible. Texas A&M Forest Service guidance adds that when trenching within the critical root area is unavoidable, work should be done as far from the trunk as possible, using non-destructive methods, with clean root cuts and supplemental irrigation before, during, and after the work.
Non-destructive excavation options:
- Air excavation (airspade): Supersonic air breaks up soil without cutting roots; the preferred method for exposing root systems in sensitive zones
- Hydro/vacuum excavation: High-pressure water loosens soil; a vacuum removes spoil; effective for soft soils and utility crossings
- Directional boring (horizontal directional drilling): Installs conduit or pipe under the root zone without surface trenching; best for longer utility runs
- Hand-digging: Appropriate for short distances and shallow utilities; slow but precise
For utility crossings that must pass through a critical root area, Pressure Works notes that non-destructive excavation techniques reduce root damage compared to mechanical trenching, and that tunneling or boring under root zones is preferable to cutting through them.
When roots must be cut, the cut itself is not the only injury. The exposed root surface is a direct pathway for pathogens and desiccation. Make cuts with a sharp saw or pruning tool at a right angle to the root, irrigate the area immediately, and cover exposed soil with wood chips within hours of the cut.
If roots larger than 2 inches in diameter must be severed, consult the arborist before proceeding. Cutting a major structural root close to the trunk can destabilize a tree that otherwise appears healthy. Schedule sensitive root work during cool, moist seasons, typically late fall or early spring in most of the country, when root stress is lower and recovery is faster.
6. On-site controls during active construction: supervision, training, and materials handling
A TPZ fence and a well-drawn site plan accomplish nothing without daily enforcement. The Mississippi State Extension is direct on this point: tree protection must be an active, continuously supervised practice because damage is often cumulative and delayed. A single careless act, a concrete truck parked inside the fence for 20 minutes, can initiate a mortality spiral that kills the tree two years later.
Supervision and inspection requirements:
| Task | Frequency | Responsible Party |
|---|---|---|
| TPZ fence inspection | Start of each workday | Site supervisor |
| Photographic record of fence line | Weekly | Site supervisor or arborist |
| Arborist site visit | At key milestones (grading, utility work, foundation pour) | ISA-certified arborist |
| Worker toolbox talk on tree protection | Before mobilization and after any crew change | General contractor |
| Incident documentation | Immediately upon any TPZ violation | Site supervisor |
Worker training is not optional. Every crew member who works on the site needs to understand the exclusion zones before they pick up a tool. Toolbox talks should cover three points: where the TPZ boundaries are and what the signs mean, what equipment and activities are prohibited inside those boundaries, and who to call immediately if a violation occurs or a root is accidentally exposed.
Materials and equipment staging must happen outside TPZ boundaries. Designate hard-surface or gravel staging areas for lumber, pipe, concrete forms, and equipment parking. If the site is tight, the arborist and site supervisor should agree on a staging plan in writing before mobilization. Temporary crossings, when unavoidable, require ground protection mats rated for the equipment load, and they must be removed and the soil inspected as soon as the crossing is no longer needed.
7. Short- and medium-term post-construction care
Tree care does not end when the last contractor leaves the site. The period immediately following construction is when many trees begin their decline, and the first 1–3 years determine whether a stressed tree recovers or slowly fails.
Post-construction care schedule:
| Timeframe | Priority Actions |
|---|---|
| Day 1–7 after work ends | Remove all materials from TPZ; repair any grade disturbance; deep-water root zone |
| Month 1–3 | Maintain 3–4 in wood-chip mulch; water weekly if rainfall is below 1 in/week |
| Month 3–6 | First arborist inspection; assess canopy for dieback, leaf size, and color |
| Year 1 | Soil test; core aeration if compaction is present; light structural pruning if needed |
| Year 2–3 | Annual arborist inspection; vertical mulching if soil remains compacted; monitor for pests |
Watering is the single most effective post-construction intervention. Damaged root systems cannot absorb moisture efficiently, so trees need more water, not less, during recovery. Apply 10 gallons per inch of DBH per week during dry periods for the first two growing seasons. Drip irrigation or soaker hoses placed at the outer edge of the root zone are more effective than overhead sprinklers.
Signs of delayed decline include smaller-than-normal leaves, early fall color, progressive dieback from branch tips inward, and unusual pest or disease pressure. These symptoms can appear 1–10 years after the damaging event, which is why annual inspections matter even when a tree looks fine at the end of construction. Mississippi State Extension specifically notes that damage is often cumulative and delayed, making multi-year monitoring a practical necessity, not an optional add-on.
Low-rate fertilization with a slow-release nitrogen source can support recovery in year two, but only after a soil test confirms a deficiency. Fertilizing a tree under severe root stress without testing can accelerate decline. Vertical mulching, drilling 2-inch holes on 2-foot centers across the root zone and filling them with compost, improves both aeration and nutrient availability in compacted soils.
Hand the site back to the owner with a written maintenance log, a copy of the arborist's post-construction report, and a recommended inspection schedule. A tree that receives no follow-up care after construction is far more likely to become a hazard tree within five years.
8. Remediation options and when removal is the only safe choice
Not every damaged tree can be saved, and attempting to save one that cannot recover wastes money and creates a safety liability. The decision to remediate or remove should be made by an ISA-certified arborist based on objective criteria, not optimism.
Signs that indicate irrecoverable injury:
- Loss of more than 50% of the structural root system within 3× DBH
- Progressive canopy dieback exceeding 40% over two consecutive growing seasons
- Fungal conks, carpenter ant activity, or soft wood at the root flare indicating internal decay
- Significant lean that developed after construction, suggesting root failure
- Pest or disease infestation that arrived immediately after construction stress
Remediation options and their realistic effectiveness:
Core aeration and vertical mulching improve soil conditions and give recovering roots better access to oxygen and water. Radial trenching, cutting narrow trenches outward from the trunk like spokes on a wheel and backfilling with porous compost, decompacts the soil without severing major roots. Targeted irrigation programs address drought stress directly. Growth regulators, specifically paclobutrazol applied as a soil drench, reduce shoot growth and redirect energy to root recovery; this is a legitimate tool when used under arborist supervision.
A damaged tree near a structure, a parking area, or a pedestrian path is a liability. Research in Arboriculture & Urban Forestry confirms that root loss within 5× DBH produces measurable reductions in structural stability. A tree that looks alive but has lost its anchoring roots can fail without warning in a storm.
Decision logic:
- Arborist assesses root loss percentage and canopy condition
- If root loss is under 30% and canopy is stable: remediate and monitor annually
- If root loss is 30–50% and canopy shows early dieback: intensive remediation with 6-month re-evaluation
- If root loss exceeds 50%, canopy dieback exceeds 40%, or structural failure risk is present: plan removal
Removal is not a failure. On a construction site, a compromised tree that becomes a hazard represents a far greater cost, in liability, emergency response, and property damage, than a planned removal would have.
9. Typical timeline and cost considerations for tree-preservation measures
Tree preservation is not free, but it is almost always less expensive than post-construction replacement, litigation, or emergency hazard removal. Understanding the cost drivers helps owners and developers budget realistically and avoid the false economy of skipping protection measures.
Project-phase timeline and cost drivers:
| Phase | Typical Activities | Primary Cost Drivers |
|---|---|---|
| Pre-construction (4–8 weeks before mobilization) | Arborist inventory, TPZ design, conditioning | Arborist fee, mulch, irrigation |
| Mobilization | TPZ fencing installation, signage, site plan update | Fencing materials, labor |
| Active construction | Arborist monitoring visits, non-destructive excavation | Airspade/hydro-vac rental or contractor, arborist visits |
| Post-construction (Year 1) | Inspection, watering, aeration, mulching | Arborist inspection, irrigation, aeration equipment |
| Post-construction (Years 2–3) | Annual inspection, vertical mulching, remediation if needed | Arborist, remediation materials |
Scope-level preservation packages:
A basic preservation package for a single residential project typically includes an arborist assessment, TPZ fencing for 2–4 trees, and one post-construction inspection. A mid-range package adds non-destructive excavation for one utility crossing, a monitoring log, and two years of annual inspections. A full-scope package for a commercial development adds multiple arborist site visits during construction, airspade work for all utility crossings within critical root areas, a tree preservation bond, and a 3-year post-construction monitoring program.
Colorado State University Extension recommends including financial protections such as tree preservation bonds or liquidated-damages clauses in construction contracts. These bonds serve two purposes: they give contractors a direct financial incentive to protect trees, and they fund remediation or replacement if damage occurs.
Mitigation fees paid to a municipality for permitted tree removal can sometimes be redirected into on-site preservation measures if the preservation plan is submitted before permits are issued. Check with the local planning department early in the design process.
10. Contract language, monitoring responsibilities, and financial protections
A tree preservation plan that exists only on paper is not a preservation plan. The clauses below convert good intentions into contractual obligations with financial consequences.
Who signs what: The property owner or developer signs the arborist's preservation plan and attaches it to the construction contract as a protected exhibit. The general contractor signs an acknowledgment that TPZ boundaries are binding site constraints. Subcontractors receive written notice of TPZ locations and restrictions before their first day on site.
Sample contract clauses to include:
- Pre-construction arborist survey: "Contractor shall not mobilize equipment or begin clearing until the Owner's arborist has completed a pre-construction tree inventory and TPZ boundaries have been staked and fenced."
- TPZ as a protected drawing: "Tree Protection Zones shown on Drawing [X] are binding site constraints. No equipment, materials, or soil disturbance is permitted within TPZ boundaries without written authorization from the Owner's arborist."
- Baseline documentation: "Contractor shall photograph all TPZ fence lines within 24 hours of installation and submit photos to the Owner's representative."
- Inspection schedule: "Owner's arborist shall conduct site inspections at mobilization, rough grading, utility installation, and final grading. Contractor shall provide 48-hour notice before each phase begins."
- Liquidated damages: "Each documented TPZ violation shall result in a deduction of $[X] from the contract sum, representing the estimated cost of remediation and the diminished value of the affected tree."
Including a tree preservation bond or holdback in the contract changes contractor behavior. Financial accountability speeds remediation and reduces the likelihood of violations in the first place, according to Colorado State University Extension.
Enforcement workflow when a violation occurs:
- Site supervisor documents the violation with photographs and a written incident report
- Supervisor issues a stop-work notice for the affected area
- Owner's arborist inspects within 24 hours and prescribes remediation
- Contractor completes remediation at their own expense within the arborist's specified timeframe
- Arborist confirms remediation is complete; work resumes
- Liquidated damages deduction is applied to the next payment application
Mississippi State Extension notes that contractually required monitoring with immediate consequences for violations is the most effective deterrent, precisely because delayed symptoms make later contractor accountability nearly impossible without contemporaneous documentation.
Pro Tip: Require the general contractor to include TPZ protection requirements in every subcontractor's scope of work. A subcontractor who was never told about the exclusion zone is a contractor who will violate it.
Why tree protection is worth the investment
The conventional wisdom on construction sites is that tree protection is a cost center, a compliance checkbox that slows work and adds fees. That framing gets it backwards. A mature tree on a residential lot adds measurable appraised value to the property. Replacing it with a nursery specimen takes 20–30 years to approach the same canopy size, assuming the replacement survives at all.
The deeper issue is timing. The decisions that determine whether a tree lives or dies are made in the design phase, before a single permit is pulled. By the time a contractor is on-site, the options narrow to mitigation and damage control. An arborist brought in at the design table, not called in after the footprint is set, can redirect a utility corridor, recommend a pier foundation, or flag a root conflict that would have cost far more to address later.
Construction damage to tree roots is also a slow-motion problem. A tree that looks fine at project closeout may be dead in three years. That timeline makes accountability difficult and makes proactive documentation, the signed arborist report, the baseline photos, the inspection log, the only reliable protection an owner has when the contractor is long gone.
*— Tatum
Brileytreeservice can help protect your trees through every phase
When a construction project puts trees at risk, having a licensed arborist on your side from day one makes a measurable difference. Brileytreeservice provides pre-construction tree inventories, ISA-certified arborist assessments, supervised root work, and post-construction monitoring for residential and commercial properties across Shreveport, Bossier City, Ruston, and surrounding North Louisiana areas.
The team handles permit support and insurance claim documentation, and 24/7 emergency response is available when accidental damage occurs during active construction. Whether you need a signed arborist report to attach to your construction drawings, non-destructive root work during utility installation, or a multi-year post-construction monitoring plan, Brileytreeservice has the credentials and field experience to deliver it. Request a free estimate and get a preservation plan in place before your project breaks ground.
Sources
The practical specifications in this guide draw on the following primary extension, university, and peer-reviewed sources. Each covers a distinct aspect of construction-phase tree care.
- Protect Tree Roots During Construction - Texas A&M Forest Service
- Construction and Tree Protection | NC State Extension Publications
- Preserving Trees in Construction Sites
- Protecting trees during construction - Colorado State University Extension
- Protection of existing trees on construction sites | Minnesota Stormwater Manual
- Impact of Trenching on Root Loss and Tree Stability | Arboriculture & Urban Forestry